A step-by-step guide to renovating a neglected garden
 Send a link to a friend
 [December 18, 2024]
By JESSICA DAMIANO [December 18, 2024]
By JESSICA DAMIANO
Some homeowners gaze out their windows and see lush and beautiful
gardens. Others would like to see lush and beautiful gardens but instead
are greeted by overgrown, dead or otherwise messy landscapes.
Whether you’ve inherited a neglected garden from a previous homeowner or
have been too busy to keep on top of maintenance, don’t despair:
Devising a game plan now can set you up for a much better view by next
winter.
As with most seemingly hopeless tasks, breaking the process down into
small steps performed over time will help make the project manageable.
Decide what to clear away
First, grab a notepad and take a walk around the garden. Assess each
section, determining which plants can be saved, which need to go and
which require attention. Make a list now.
Dead and invasive plants, as well as weeds, should be first on the
chopping block. If the weather allows, dig them out, removing as much of
their root systems as possible. Otherwise, tackle this first in spring.
Next, remove and give away otherwise-healthy plants that you don’t want.
Online buy-nothing groups and neighborhood pages are great places to
find takers. Many will even be willing to do the digging if it means
getting a free plant.

If the property has been overrun with a thicket of plants, shrubs, trees
and vines that have grown wild, a chainsaw, brush mower or brush grubber
may be in order.
Define any new beds
If you’re dealing with a lot of weeds or want to create new garden beds
in a lawn, you can smother the existing vegetation rather than dig it
up. Determine the shape and size of the bed or border, and cover that
area with cardboard or thick layers of newspaper. This can be done now,
topped with 3 inches of compost and 2 inches of mulch, and left to sit
over winter. It can also wait until planting time.
When you’re ready to plant, you'll be cutting root-size holes in the
cardboard for your plants. Most weeds will be suppressed, but some may
sneak through and require pulling or more cardboard.
How and when to prune
Healthy but overgrown or unproductive deciduous shrubs (the types that
lose their leaves) can be rejuvenated by pruning. Do this when branches
are bare in late winter.
Choosing a method will require weighing aesthetics against rebound time
and deciding which is right for you. The fastest (but most severe)
method would be to cut the whole plant down just above ground level.
It’s scary, but most shrubs can handle this and will bounce back
stronger.
If retaining height in the garden is important, you can opt to prune
each branch or stem individually at uneven heights. Or cut back
one-third of the plant’s branches each year for three years. The latter
would have the least drastic effect but require the most patience.
Evergreen trees and shrubs should only undergo selective pruning (the
shortening of individual branches). Take care to avoid over-shearing or
creating holes in needled evergreen plants and trees; with the exception
of yews, they won’t fill back in.
[to top of second column]
|
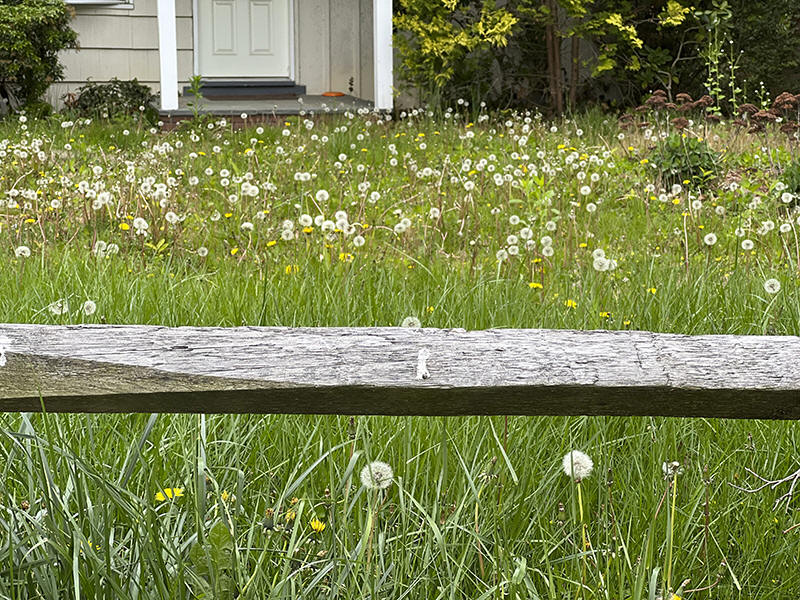
This May 2023 image provided by Jessica Damiano shows a neglected,
overgrown property on Long Island, New York. A step-by-step approach
is the best strategy for reigning in such gardens. (Jessica Damiano
via AP)
 Looking to the dirt
Now that you have a clean canvas, turn your attention to the soil.
Test the soil’s pH to ensure it’s within range for the plants you
plan to add. Test kits are available at local and online garden
retailers. Your local cooperative extension service may provide
testing and soil-amendment advice for a nominal fee.
If indicated, incorporate lime or elemental sulfur into the soil to
raise or lower its pH, following package instructions.
If the soil is hard and compacted, use a core aerator or
long-handled garden fork to create 2-3-inch holes through which air
and water can enter.
Finally, spread a 2-to-3-inch layer of compost or well-rotted manure
over the area. As it decomposes, nutrients will work their way into
the soil.
Planting considerations
After completing the above steps, it will be time to plant your new
garden. If by summer you’re not yet ready to plant, apply mulch or
use annuals to protect the bare soil.
When you’re ready to plant new trees, shrubs and/or perennials,
carefully select varieties that will not run rampant. Dig holes just
as deep as their roots but twice as wide and space them
appropriately to allow for their mature sizes.
For the lowest maintenance going forward, consider hardy,
pollinator-friendly, drought-tolerant native plants.
Incorporate non-invasive groundcovers into beds to serve as a
natural mulch and discourage weeds – remember, if you don’t plant
something in bare spots, God will. While you wait for groundcovers
to fill in, apply 2-to-3 inches of mulch between and around plants
to help retain moisture, suppress weeds, keep soil temperatures even
and protect tender roots.

It might take a year or two -- or longer, depending on your schedule
and ability, but a step-by-step approach will avoid overwhelm and
provide a steady stream of small wins as you approach your goal.
___
Jessica Damiano writes weekly gardening columns for the AP and
publishes the award-winning Weekly Dirt Newsletter. You can sign up
here for weekly gardening tips and advice.
For her favorite tools and gear of the past year, see her 2024
gardening gift guide.
All contents © copyright 2024 Associated Press. All rights reserved
 |