|
 Maximize
Seed Starting Success with a Seed Starting Chart Maximize
Seed Starting Success with a Seed Starting Chart
By Melinda Myers
 Send a link to a friend
[January 11, 2025]
Now is the time when many of us are busy ordering
seeds. We often end up with many seeds, some new ones we needed or
wanted and perhaps a few duplicates of those we have left from past
seasons. It is easy to overlook some of these as the indoor and
outdoor planting season begins.
Save money by inventorying your current seed collection, reducing
the risk of ordering seeds you don’t need. Decide what seeds you
want to keep and grow this season and those you want to pass along
to or swap with gardening friends. You may choose to make seed art
with older or improperly stored seeds and invest in fresh seeds that
are sure to germinate. |
|
 If
in doubt, check the seed viability of older stored seeds with a
simple germination test. Wrap ten seeds in a damp paper towel and
place them inside a plastic bag. Check the seeds in a week or so to
see how many sprout. If all the seeds sprout, follow the planting
guidelines on the seed packets. When only half the seeds sprout, you
will need to plant the seeds twice as thick and so on. If
in doubt, check the seed viability of older stored seeds with a
simple germination test. Wrap ten seeds in a damp paper towel and
place them inside a plastic bag. Check the seeds in a week or so to
see how many sprout. If all the seeds sprout, follow the planting
guidelines on the seed packets. When only half the seeds sprout, you
will need to plant the seeds twice as thick and so on.
Check catalogs and your favorite garden center for any seeds you
need to purchase. Place your order early for the best selection.
Once the seeds arrive, look at the back of the packet to determine
when to start the seeds indoors or out. Many seed companies now
provide this information on their website instead of the seed
packet. Check with your local University Extension website for
recommended planting dates in your area.
Record the start date on your calendar, garden chart, or spreadsheet
to make the process easier. Consider organizing your seeds to make
it easier to find and plant them at the proper time. You may want to
organize the seeds in alphabetical order or by the month for
planting. Design a system that works best for you.
You can create your own seed storage organizer or purchase one.
Store the seeds in a cool dark location in an airtight container to
help maintain their viability and keep them safe from mice.
Once your seed starting schedule is created and seeds are organized,
prepare the space for starting seeds indoors if needed. Make sure
your grow lights are in working order and you have sufficient
containers, flats, and seed starting mix for planting.
[to top of second column] |

Save money by repurposing yogurt, applesauce, and
similar food containers into seed starting pots. Just clean and add
drainage holes. Look for used cell packs, flats, and small pots that
can be used again. Disinfect these by soaking them in a one-part
bleach and nine-part water solution for ten minutes then rinse with
clear water. Repurposing saves you money and helps reduce plastic
waste and the risk of disease that could kill your seedlings.
Taking time to plan and organize now can save you money while
helping you maximize the productivity and beauty of your gardens.
Melinda Myers has written over 20 gardening books,
including Midwest Gardener’s Handbook, Revised Edition, and Small
Space Gardening. She hosts The Great Courses “How to Grow Anything”
instant video and DVD series and the nationally syndicated Melinda’s
Garden Moment radio program. Myers is a columnist and contributing
editor for Birds & Blooms magazine. Myers’ website is www.MelindaMyers.com.
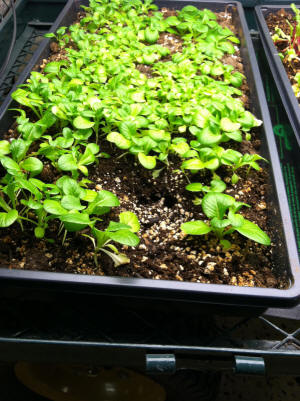
[Photo courtesy of MelindaMyers.com]
 |